I’ve been coding professionally for over 20 years and I still learn new things every single day. One of the most fun and rewarding ways I use to get better is to recreate things in games I love. And I’m in love with so many games. It never ends. An endless, lovely, gamedev tutorial!
One of the games I love is Beat Saber. I wanted to recreate it as a VR learning experience on my HTC Vive. It was a really fun journey. The first thing I needed to work out was to find a good way to slice geometries. That kinda sidetracked me for a while. But that’s another beautiful story including sliced unicorns, which might just be a future blog post.
So, after the mesh slicing was in place I needed lazers. Everyone who has played Beat Saber knows that you need cubes with some kind of lazer material. Turns out creating lazer cubes is a really nice tutorial for shader newbies. We’ll base everything on the ShaderModifier source from here. The code for this tutorial is in in the same repository but in the lazer branch.
git clone git@github.com:deurell/ShaderModifierLab.git
git checkout lazer
The only change in the ViewController setup is that we use a cube instead of a plane.
let geo = SCNBox(width: 6, height: 6, length: 6, chamferRadius: 1.0)
After that we setup the shader to just output the UV coordinates. This is pretty much the starting point for all shader dev work, especially if we have modified the coordinate system. Outputting the UVs with X as red, Y as green and 0 as blue looks like this. You’ll remember this as a sign of “Oh nice, everything seems to be ok”.
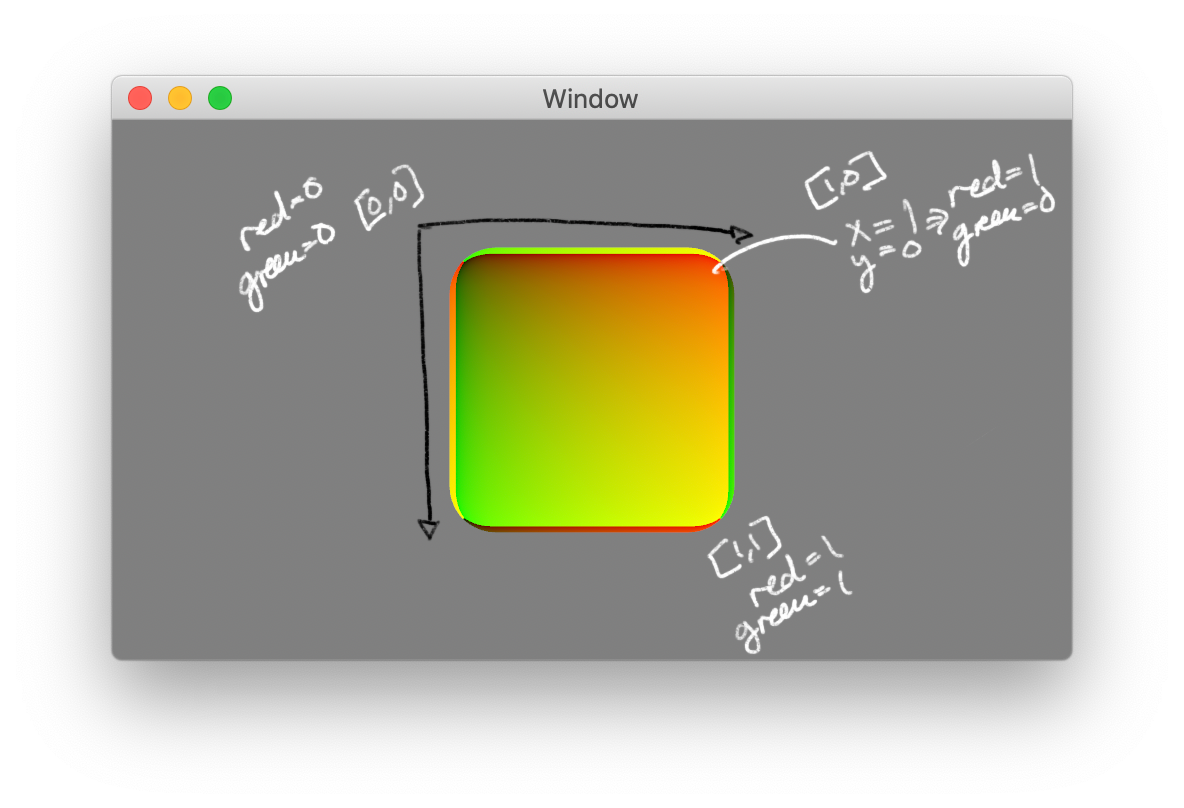
SceneKit calls UV’s Texcoords, just like Unreal, and it stashes them in _surface, in this case in diffureTexcoord. The shaderModifier code looks like this:
#pragma transparent
#pragma body
float2 uv = _surface.diffuseTexcoord;
_output.color.rgb = float3(uv.r, uv.g, 0);
The first thing we have to do to turn it into a lazer is adding a fancy sine curve:
float2 uv = _surface.diffuseTexcoord;
float col = sin(uv.y * M_PI_F);
_output.color.rgb = float3(col, col, col);
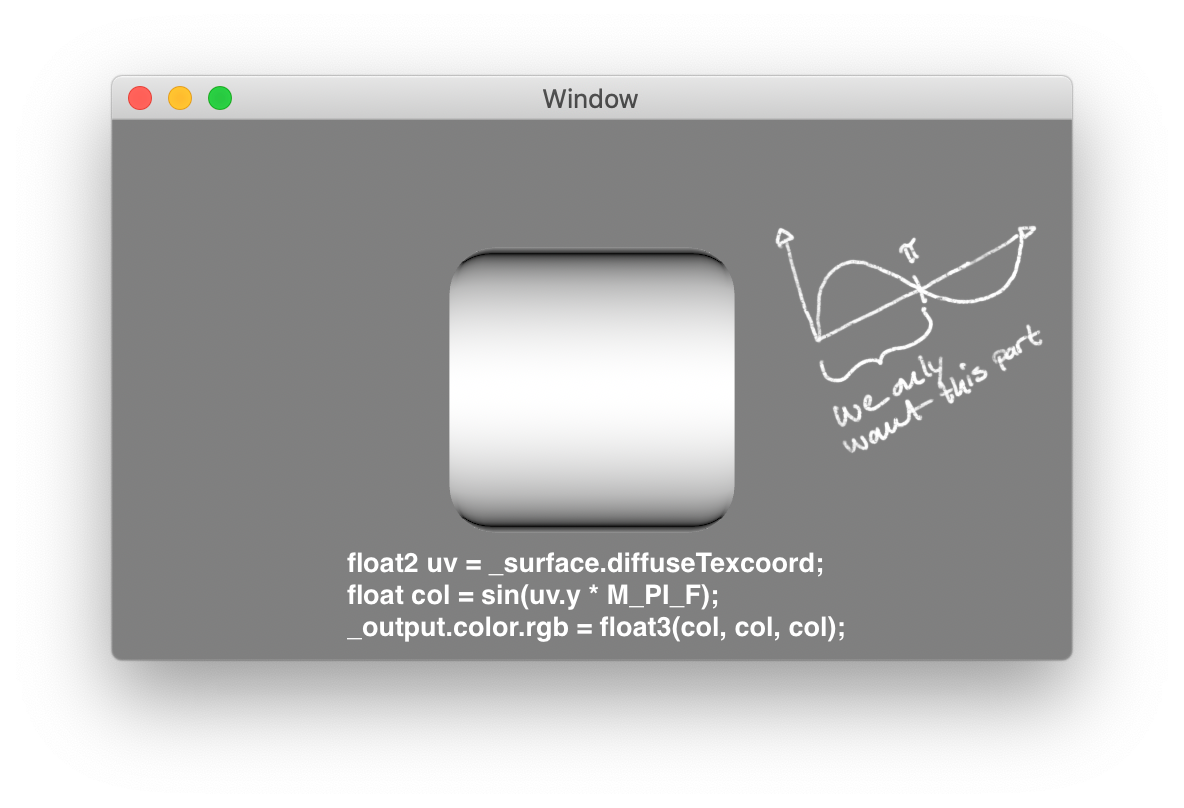
We only want the first 180 degrees of the sine curve, since we have radians we’ll get values from 0-pi rad (0-180 deg). The next step will be to invert it and pow it in order to push it to the edges. We want the lazers to be concentrated to the edges of the cube. Like this:
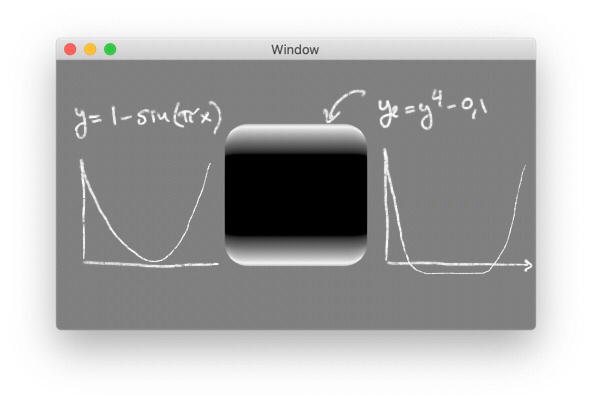
Now we’ll just need to do the same thing for the horizontal lazers. We also need to merge/lerp the horizontal and vertical lazers as we want lazers on all the edges on the cube. Lerp in shaders is called mix and that’s exactly what we want to do. We really want to merge them with a 0.5x+0.5y and this is exactly what mix(x,y,0.5)does.
The next step is to pimp the gray lazer with some green color. That’s just a multiplication with a green [red=0.2,green=0.9,blue=0.2] vector. A litte dash of whiteness look better so we multiply the final color vector with 8. And that’s it! A good enough lazer cube to slice with a light saber! The final shader code looks like this:
#pragma transparent
#pragma body
float2 uv = _surface.diffuseTexcoord;
// horizontal
float x = 1.0-sin(uv.x*M_PI_F);
x = pow(x,4) - 0.1;
// vertical
float y = 1.0-sin(uv.y*M_PI_F);
y = pow(y,4)-0.1;
// interpolate. In this case same as 0.5*x+0.5*y
float mx = mix(x,y,0.5);
float3 col = float3(0.2, 0.9, 0.2) * mx;
col *= 8.;
_output.color.rgb = col;
And the final result looks like this:
<3